Maintenance of WIRTGEN toolholders
Contents
- Introduction
- Replacing the HT11 toolholder
- Dismantling a worn toolholder
- Installing a new toolholder
- Unacceptable actions
- Measures to reduce operating costs
Introduction
Reliable and durable cutting tools are essential for precise and efficient milling and cutting processes. With the innovative WIRTGEN router mounting systems, the router bits are firmly mounted and can be changed quickly and easily on the construction site.
Constant further development of the router mounting systems is a constant objective in order to increase productivity and efficiency.
Damaged or worn milling cutters and tool mountings should be replaced to minimize operating costs. WIRTGEN's toolholder HT11, HT22 systems enable the quick and easy replacement of milling cutters and toolholder mounts right on the construction site. Changing toolholder systems basically consist of two parts: the pick (lower part of the toolholder) which is welded to the milling drum tube and the toolholder (upper part) which is connected to the pick by means of a quick-release screw connection.

Replacing the HT11 toolholder
If a toolholder (e.g. Ht11) has exceeded its wear limit due to length, damage or erosion, it must be replaced. Otherwise the milling drum will be subject to wear.
The article offers a detailed overview of the replacement of the toolholder system on the ht11 as an example.
The following steps are required to remove the toolholder:
- First, we provide access to the plugs, pre-cleaning them from asphalt residue and other material (you can do this with compressed air).
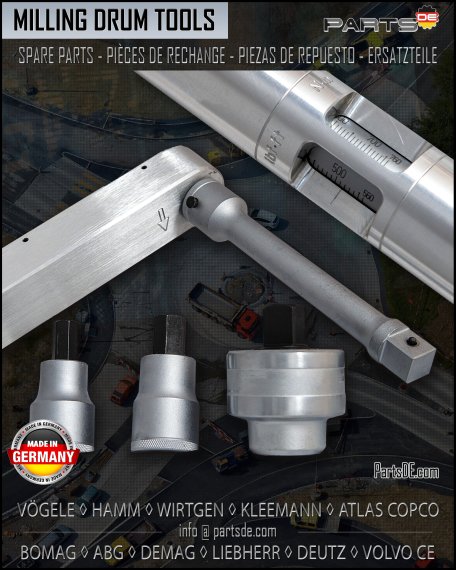
- Then you can freely unscrew the fixing screw with the ratchet. (Slip-on ratchet right-turn 3/4" 97204)
- After removing the mounting screw, the toolholder can be removed from the bottom.
It is important to remember that the same fastening screw should not be used more than once, as this can cause deformation of the thread pitch and screw head. This can lead to premature failure of the toolholder.
For mounting and dismounting the toolholder it is important to use tools specifically designed for this purpose. Two types of torque wrenches are available for this purpose:
Installing a new toolholder
Before installing a new toolholder, the following steps should be carried out step by step:
- Clean the underside from the inside with compressed air. This ensures that the contact surfaces between the toolholder and underside are perfectly connected and also ensures that the toolholder shank is deeply seated
- Thread a bottom seal over the toolholder shank (the shape of the seal must be taken into account). The seal makes it harder for the milled material to enter and makes it easier to dismantle the toolholder in the future
- The shank of the tool holder and the fixing screw should be lubricated with heat-resistant grease (up to 100 °C).
This lubricant has an additional sealing effect and protects the tool post from corrosion and will also allow easier disassembly. - Use a hexagon socket head to insert the screw by hand (at least three turns).
- The toolholder should be tightened with the ratchet (Slip-on ratchet right-turn 3/4" 97204).
- Finally the screw should be tightened to 500 Nm with a torque wrench up to 700 Nm (2753140) or
Torque wrench 160 - 800 Nm (68273) - After the screw has been properly fastened, an audible check should be made. This is done by hitting the front contact area of the toolholder with a copper hammer. This confirms that the toolholder is securely fastened. Then the tightening torque (500 nm) of the toolholder screw should be confirmed again with a torque wrench (68273).
- Insert the plug. This will make it difficult for old asphalt to reach the toolholder mounting, making it easy to replace in the future. With proper maintenance, the toolholder can be replaced in minutes.
- And the last step is to install the new cutter W6/20 (2993005)

Unacceptable actions
6 Don'ts when replacing toolhoders:
- Do not use used locking screws when replacing the holder.
- Do not use screws that look similar, but only original screws that match the catalog number.
- Do not use improper tools
- Do not use an impact screwdriver to tighten the set screws so as not to damage the screw head.
- Do not forget to tighten the set screws to avoid loosening the toolholders
- Do not weld the top of the toolholder to the bottom
Measures to reduce operating costs
- Re-tighten after the first day of operation
- Retighten every 200 to 250 operating hours
- When replacing toolholders, make sure you have the correct tools and follow the installation instructions
- Remember to notch the threads correctly if necessary
- Tightening torque should be set at 500 nm. Be sure to use a new set screw and lubricate the square rod and set screw accordingly. Install the plug, and replace all worn toolholders in the same manner for uniform milling results.
- After heavy milling, retighten the screws on the toolholders to a torque of 500 nm.
